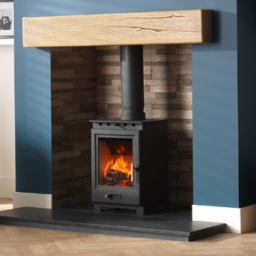
There’s something deeply satisfying about the crackling sound of burning logs on a cold winter evening. The warm, dancing flames create an ambiance that no electric heater can replicate, while the gentle heat radiates throughout your home, creating a cosy sanctuary from the harsh weather outside. If you’ve been dreaming of installing a wood-burning stove but assumed it was beyond your DIY capabilities, think again.
Why Choose a Wood Burning Stove?
Wood stoves offer numerous advantages that make them an increasingly popular choice for homeowners. First and foremost, they provide exceptional heating efficiency, often warming large areas with a fraction of the energy cost of electric heating. Unlike gas or oil systems, wood is a renewable resource that you can often source locally, reducing both your carbon footprint and heating bills.
Beyond the practical benefits, there’s an undeniable aesthetic appeal. A small log burner becomes a focal point of any room, creating a warm, inviting atmosphere that transforms the entire character of your living space. The gentle glow and hypnotic flames provide a natural stress reliever after long, busy days.
The DIY Advantage: More Achievable Than You Think
Many homeowners shy away from wood stove installation, assuming it requires professional expertise and substantial costs. However, with proper planning, quality materials, and reliable guidance, installing a wood stove can be a rewarding DIY project that saves thousands in installation fees.
The key to successful DIY installation lies in understanding the basic components and following proper safety protocols. You’ll need a suitable stove, appropriate flue pipes, proper ventilation, and adequate clearances from combustible materials. While the process requires attention to detail, it’s well within the capabilities of most competent DIY enthusiasts.
Planning Your Installation
Before purchasing any equipment, carefully assess your space and heating needs. Consider the size of the area you want to heat, the layout of your home, and the best location for optimal heat distribution. The ideal spot typically offers central placement with adequate clearance from walls, furniture, and other combustible materials.
Research local building codes and regulations, as requirements vary by location. Many areas require permits for wood stove installations, and some have specific requirements regarding flue height, clearances, and ventilation. Understanding these requirements upfront prevents costly mistakes and ensures your installation meets safety standards.
Choosing the Right Equipment
Selecting appropriate equipment is crucial for both safety and performance. Modern wood stoves come in various sizes and styles, from compact units perfect for smaller rooms to larger models capable of heating entire homes. Consider factors such as heating capacity, efficiency ratings, and aesthetic preferences when making your selection.
The flue system is equally important, requiring pipes specifically designed for wood-burning applications. Quality flue pipes ensure proper ventilation, preventing dangerous build up of smoke and gases while maintaining optimal draft for efficient burning. Investing in high-grade materials pays dividends in safety, performance, and longevity.
Safety First: Essential Considerations
Safety should never be compromised during installation. Proper clearances from combustible materials are non-negotiable, typically requiring specific distances from walls, ceilings, and furniture. Install appropriate heat shields where necessary, and ensure adequate ventilation throughout the installation area.
Carbon monoxide detection is essential in any home with fuel-burning appliances. Install detectors near the stove and throughout your home, testing them regularly to ensure proper function. Additionally, maintain proper fire extinguishing equipment nearby and develop an emergency plan for your household.
The Installation Process
While specific installation steps vary depending on your chosen stove and home layout, the general process follows predictable phases. Begin by preparing the installation area, ensuring level flooring and proper clearances. Install the stove base or hearth pad, providing adequate protection for surrounding surfaces.
Next, position your stove and begin flue pipe installation, working systematically from the stove upward. Pay careful attention to joint connections, ensuring secure fits and proper sealing. The flue system must extend above the roofline according to local codes, typically requiring specific height clearances above surrounding structures.
Long-term Benefits and Enjoyment
Once installed, your wood stove provides years of reliable heating and enjoyment. Regular maintenance, including annual chimney cleaning and periodic inspection of seals and gaskets, ensures optimal performance and safety. Many owners find the routine of splitting wood, tending fires, and maintaining their stove becomes a meditative, satisfying ritual that connects them with traditional heating methods.
The economic benefits compound over time, as wood often costs significantly less than other heating fuels. Additionally, wood stoves can increase your home’s value while providing emergency heating during power outages, offering both practical and financial advantages.
Getting Started
Installing a wood stove represents more than just adding a heating appliance – it’s about transforming your living space into a warm, inviting haven while developing valuable DIY skills. With proper planning, quality materials, and attention to safety, this project can be one of the most rewarding improvements you’ll make to your home.
The combination of cost savings, aesthetic appeal, and personal satisfaction makes DIY wood stove installation an attractive project for capable homeowners. Take time to research thoroughly, plan carefully, and source quality materials that ensure safe, efficient operation for years to come.
Your cosy winter evenings await – complete with crackling logs, radiant warmth, and the pride that comes from a successful DIY installation.
See our popular home expert blog page for more posts like this.

